Butter Pie Crust (Pâte Brisée)
This recipes makes two 9-inch pastry rounds, perfect for pies and quiches. I use a food processor to make the dough but you don't need to, for many years I used a fork or pastry cutter. But the food processor is so much easier and handling the dough as little as possible is important - keeping the butter cold helps the crust flake. In fact keeping the dough (specifically the butter) cold is the key to a flaky pie crust. If you were to use lard instead of butter this wouldn't be a concern. I also provide instructions on how to pre-bake (sometimes called blind baking) a crust and some tips on storing both baked and unbaked pie dough.
Ingredients:
2 1/2 cups all-purpose flour (I prefer King Arthur)
2 teaspoons salt
1 cup butter, very cold cut in 1/2-inch pieces (I put the cut butter in the freezer for 10 minutes before using)
1/4-1/2 cup ice water.
Optional:
1 tablespoon sugar (add to doughs for sweet pies)
1 tablespoon flavored liqueur (e.g., use Calvados when making an apple pie, the alcohol will help the crust flake and add great flavor).
Making the Dough
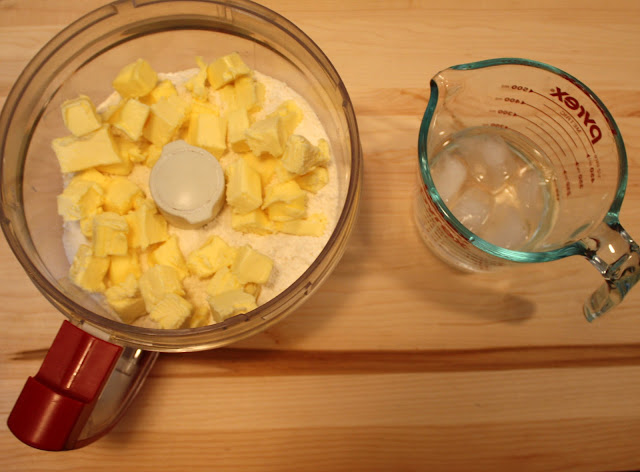
Start by placing the flour, salt, and butter in a food processor bowl. Add sugar at this point as well, if using.
Be careful not to process the dough too fast, use 1-2 pulses until the butter is the size of peas. Then drizzle 1/4 cup of ice water (and liqueur if using) over the top. Pulse until the dough comes together, add more water as needed.
The dough should look like the above picture, crumbly but moist enough that it holds together under slight pressure. Pour the dough out on a lightly floured surface.
Working quickly (you don't want the butter to melt or the crust will be tough) gather the dough and shape into a ball.
Divide the ball in half, wrap each half in plastic wrap and refrigerate (for at least 20 minutes) before rolling out. At this point you can freeze the balls of unbaked dough for up to 2 months.
Rolling the Dough
To roll out the dough start by placing one ball of cold dough on a lightly floured surface. Be sure the rolling pin is also floured. Start in the center and roll out, away from your body. Rotate the dough a 1/4 turn and repeat, always starting in the center, rolling away from your body and then rotating.
Repeat until the dough is the desired size. Don't worry if the edges break, you will trim them before baking. Brush off any excess flour.
Carefully move the dough to a pie plate. You can use the rolling pin to do this by rolling the dough onto the pin and then unrolling it onto the plate. Using your fingers, gently push the dough into the plate.
Trim the edges, remembering that the dough will shrink up slightly. How much I trim the dough depends on what I am making. For quiches and pies where the crust will be pre-baked I trim the crust just up to the plate's edge. For pies that will have a top crust I leave more dough untrimmed, so that I can seal the two crusts together after filling with fruity goodness. I use scissors to trim the dough.
You could also freeze the pie crust at this stage (again for up to 2 months). Start by freezing the dough in the pie plate, then carefully remove and seal in a plastic bag. You can stack frozen crusts this way, separated by wax paper.
If you are making a pie with two crusts (e.g., fruit pies), at this stage you should fill the bottom crust with the fruit and then refrigerate while you roll out the other ball of dough. Place the top crust on top of the filled pie, seal the edges, create slits so the steam can release, decorate, brush with an egg wash, sprinkle with sugar and bake.
Pre-Baking (Blind Baking)
For some pies the crust needs to be pre-baked. In some cases (e.g., quiches) the crust needs to be partially baked (to prevent a soggy bottom) ahead of time and in other cases (e.g., cream pies) the crust needs to be completely baked in advance.You can store baked pie crusts in the freezer for up to 4 months.
In either case start by cutting a piece of parchment paper 1-2 inches larger than the pie plate. Line the crust with the parchment paper and then fill with beans or rice. Don't use pie weights, they are too heavy and will make the crust tough.
Gently press the rice or beans into the side of the pie to prevent the pie from puffing while baking. Bake for 15 minutes at 375F.
Remove the crust from the oven. Carefully remove the rice or beans and parchment paper. Prick the bottom of the crust with a fork to release steam. If you are completely baking the crust place it back in the oven uncovered for 5-10 minutes (until lightly browned).


Personally, I add just a splash of cider vinegar to my crusts. Also a good option for those of us too poor/cheap to invest in a food processor- I actually mix my ingredients in a ziploc bag and work it together that way. Keeps the oil from my hands off the dough but without the addition of extra flour, which also makes it tough.
ReplyDeleteI've used vinegar before as well. Great tip on using a ziploc bag!
ReplyDelete